Imaxel Printspot for Woocommerce
Plugin installation
To install the plugin it is necessary to do so through a ZIP file provided by Imaxel.
To install it we must go to the Plugins menu and select Upload plugin so that the option to select file appears, upload the zip file of the plugin and proceed to install it.
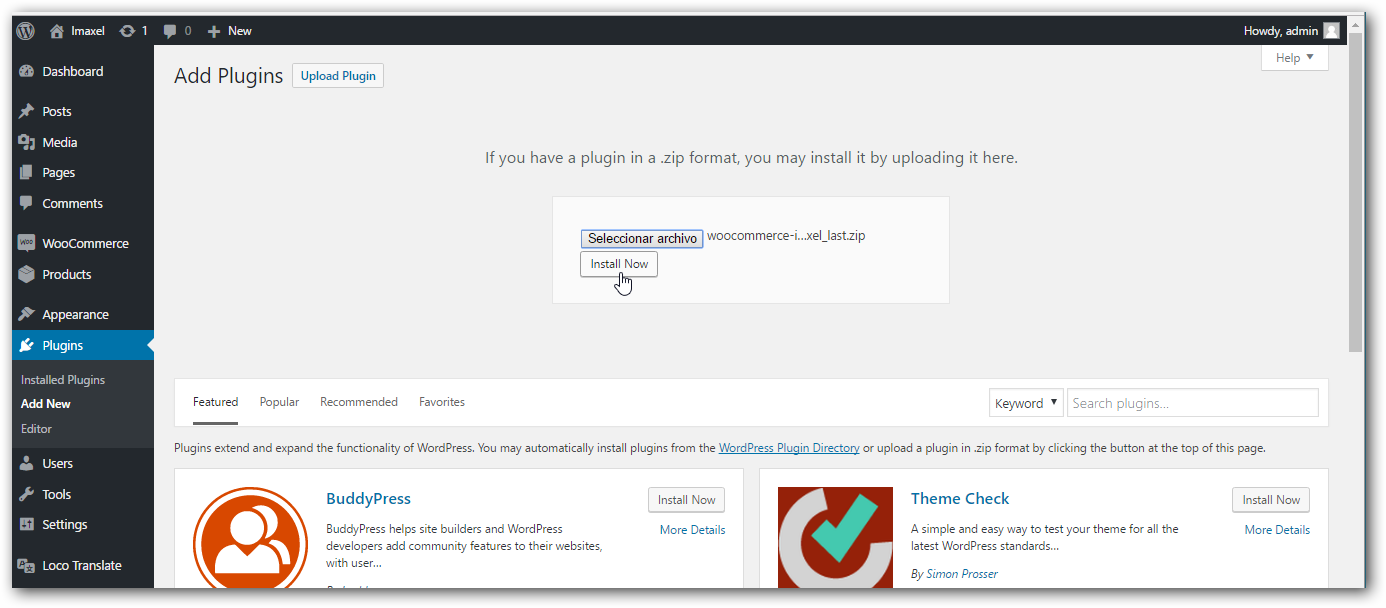
Once installed we must activate it to continue with the configuration.
Plugin configuration
The next step is to configure the plugin with the keys of our store provided by Imaxel.
When installing the plugin, a configuration tab called Imaxel ICP has been added in the WooCommerce configuration menu.
In this tab we will have to fill in the fields with the data provided by Imaxel.
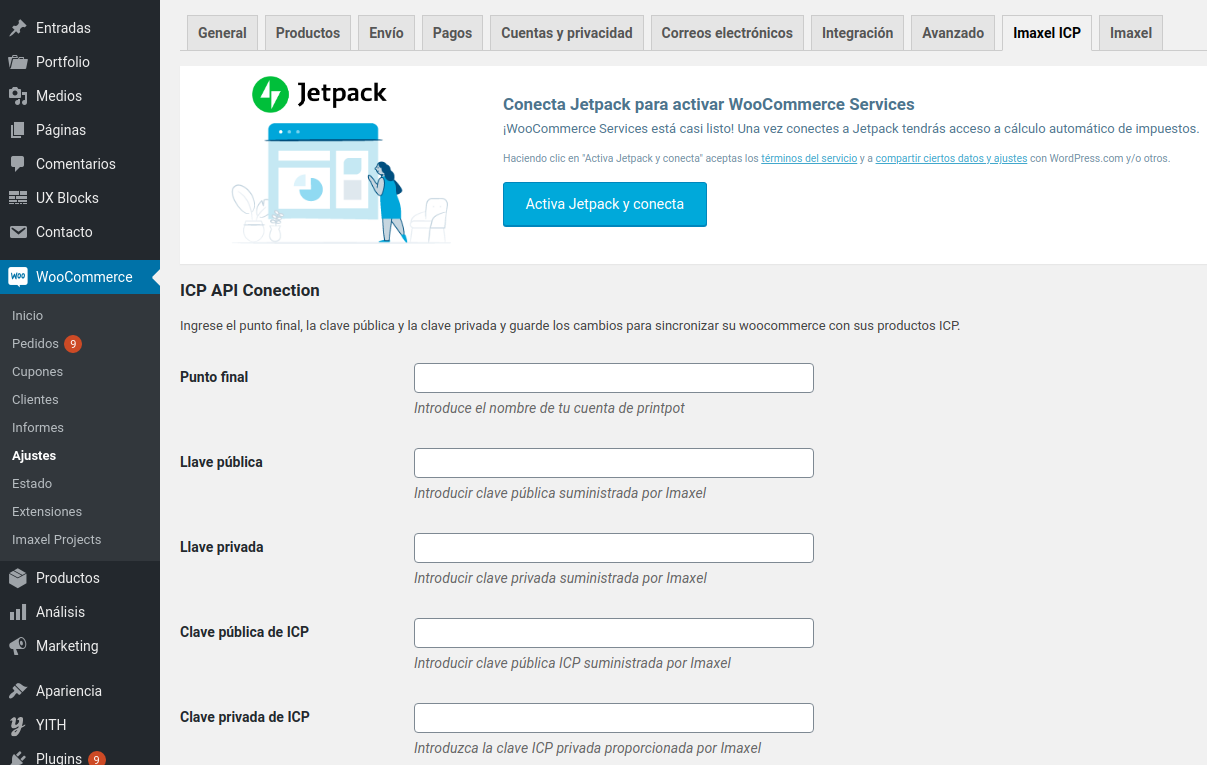
When you save the changes, the plugin downloads the list of products registered in your Printspot shop.
Every time we save the changes an update of the product list is made.
IMPORTANT! Every time we register new products in our Printspot shop, we must go to the plugin configuration and update the list of products by saving the changes so that these new products are available in the plugin and can be linked in Woocommerce.
Link Woocommerce products with Printspot
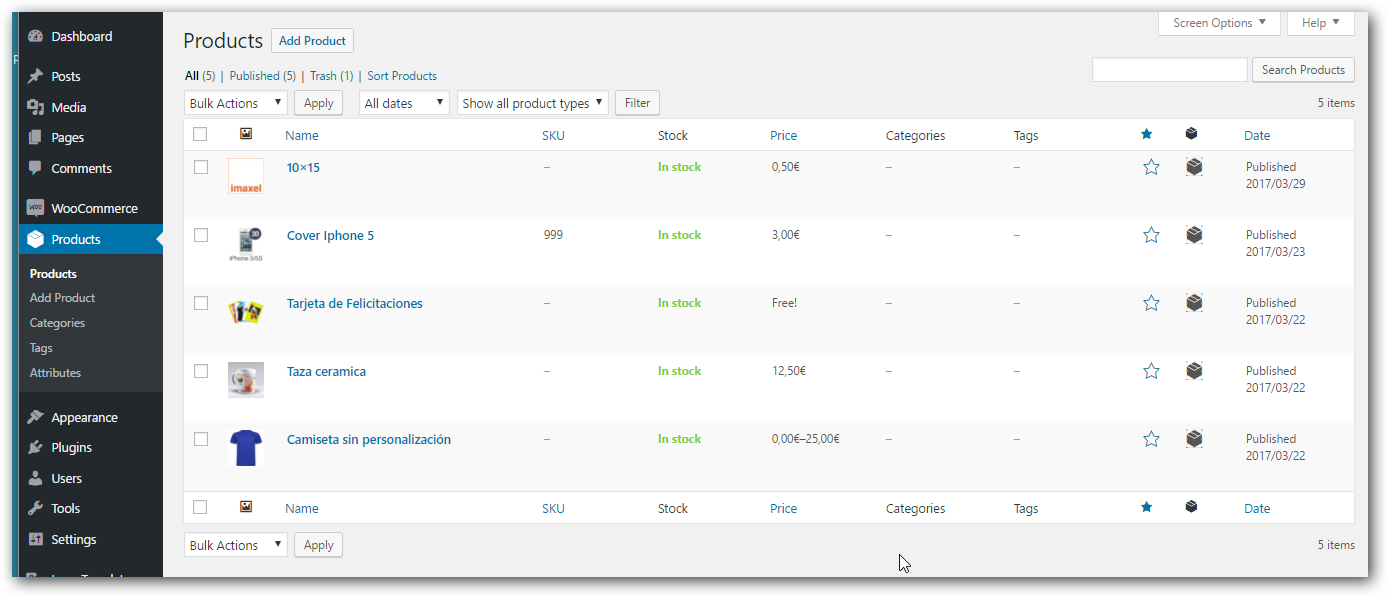
The first step is to register the products in Woocommerce and then link them to the Imaxel custom products created in the backoffice of your Printspot shop.
If we already have products created in our Woocommerce, we will simply have to link them to an Printspot product.
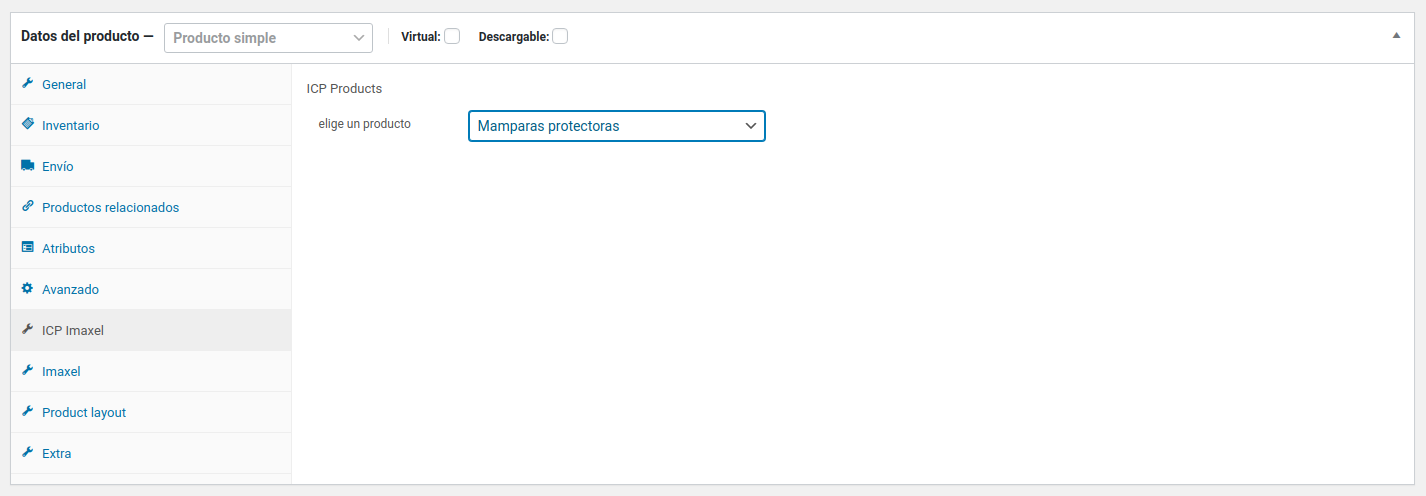
In the configuration menu of each product, we will find a new tab called ICP Imaxel, from which we can access a menu that allows linking a Woocommerce product with an Printspot product.
“Customize” button
Another feature of the plugin is that in products linked to an Printspot product, the “Add to cart” button is changed to “Customize“.
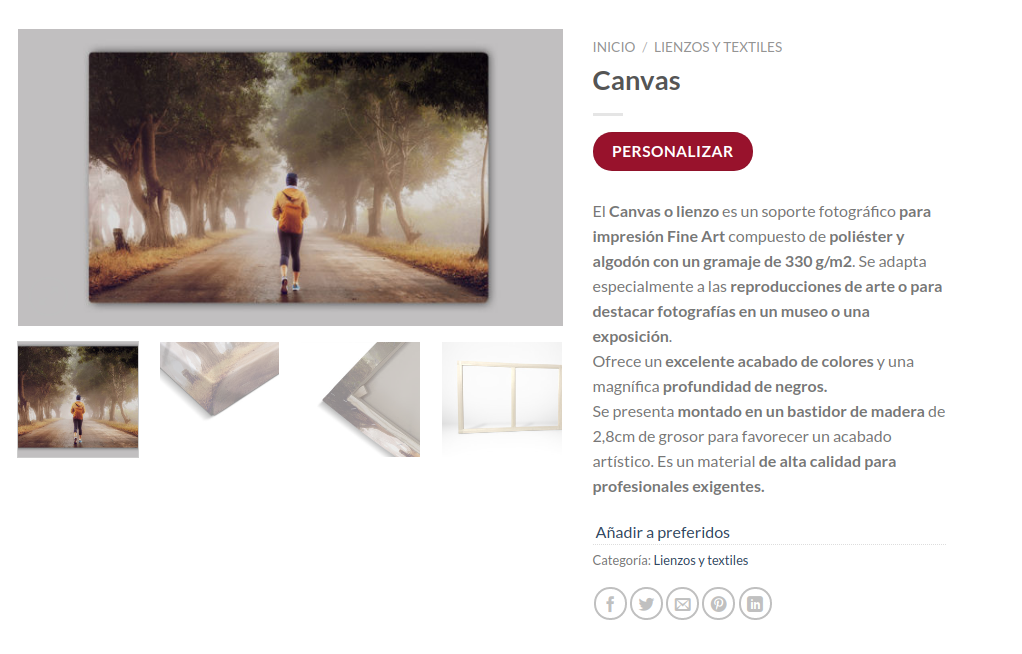
When the customer selects “Customize“, a call is launched to load the form with the previously defined steps that allows the customer to customize the product and send it to the cart to finalize their order.
IMPORTANT! If you have a problem when you press the Customize button on a product with a “Whoops! Couldn’t find that page” error page, you will most likely need to configure these final steps below.
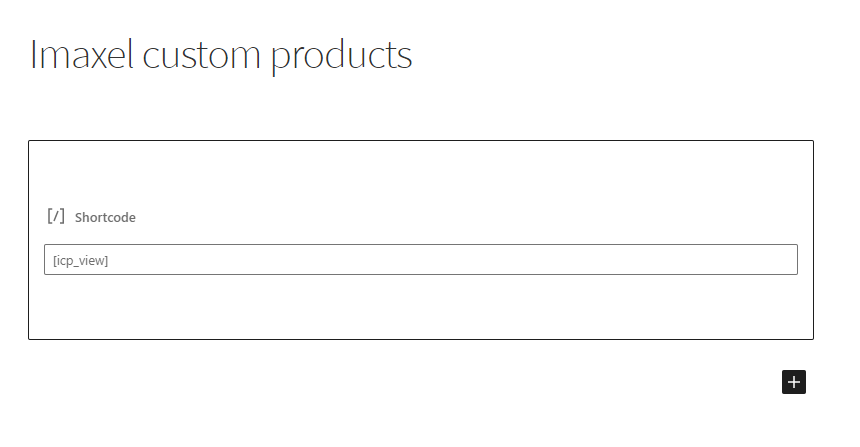
Sometimes the Imaxel custom product page in WordPress remains to be created, if you notice that such a page does not exist in your WordPress Pages panel, you need to create it and insert the shortcode [icp_view] in it, as you can see in the following screenshot:
It is normal that after publishing the page a message of “The update failed. The response is not a valid JSON response” appears, it should be ignored, since the page has been published successfully and you will have solved the problem.