Product Editors Overview
Introduction
Through the Products menu, the backoffice allows us to use a series of predefined editors for the creation and administration of different types of products.
Depending on the product to be created, it is necessary to select the most appropriate type of editor.
Many of the editors share configuration options and are designed for quick and easy product creation.
They are modules that do not require templates, but in some cases it is advisable to use vector files or PNG files so that the representation of the product on the editing page is as realistic as possible.
The creation of products can be configured in combination of some “Materials”, images that will be used as a Scene or Design to be able to apply in multiple products, and the values of the configuration of the “Products”.
IMPORTANT NOTE: Not all editors need materials to create customizable products. For example the following editors do not use them: Prints Pack, Polaroid, Simple Photobook and Multipage.
The available Project Editors are shown in the following list:
Project Editors
- Prints Pack
Editor for ordering prints online. It allows to add margins of 5 or 10 mm around the images in white or black colors.
The price model has two options: unit or price per pack of copies. You can also set prices by scaled ranges.
- Polaroids
Editor for copies of Polaroid type and copies with colored borders.
It is possible to configure the location of the client image and add a text at the bottom of the image to be printed.
You have the possibility to select different colors of the margins to be applied to the images and select a typographic font from a pre-established list.
- Simple Photobook
Editor for simple photo albums with possibility:
- add images to the design of the pages
- exchange images between pages
- change the background color and designs of the sheets and cover
- change the design of the cover: image, collage or without image
- Free Format
Editor for products without specific format, you can calculate the amount of the printed product based on multiple variables.
Supports all types of JPG, JPEG & PDF image file. The result of the final image is the same as the origin, since the function of this editor is the calculation of the amount of an order with respect to a series of variables such as types of formats, finishes, etc …
- Wide Format
Large format editor for products such as: unframed posters, framed prints, impressions on flat or solid objects and impressions on methacrylates or semi-translucent materials.
The feature of this editor is that it shows the effect configured in each product on the screen with a perspective effect. Each type of finish can have a different price.
- Canvas
Canvas Editor has the particularity that you can configure the measurements of the frame so that the resulting file includes all the thicknesses and additions so that there is no loss when assembling.
It has mirror function in the image to not lose image in the front.
- Multi Gift
Editor oriented to customize any product, and products with more than one component (customized products with different components or variables), for example personalized mug with different interior colors, two-sided printable t-shirt, two-sided customizable cushion, printed double-sided congratulations with different designs.
Graphic materials can be imported to make the product more realistic.
- Multi page
Editor designed primarily for calendars, its main feature is that it is possible to create collections of designs. Using a png file with the month of the year in a simple way it is possible to create a monthly wall calendar.
Materials
The creation of products can be configured in combination of some “Materials”, images that will be used as a Scene or Design to be able to apply in multiple products, and the values of the configuration of the “Products”.
This section is where the graphic material that we will use is managed to ensure that the product to be customized is as realistic as possible at the time of the edition.
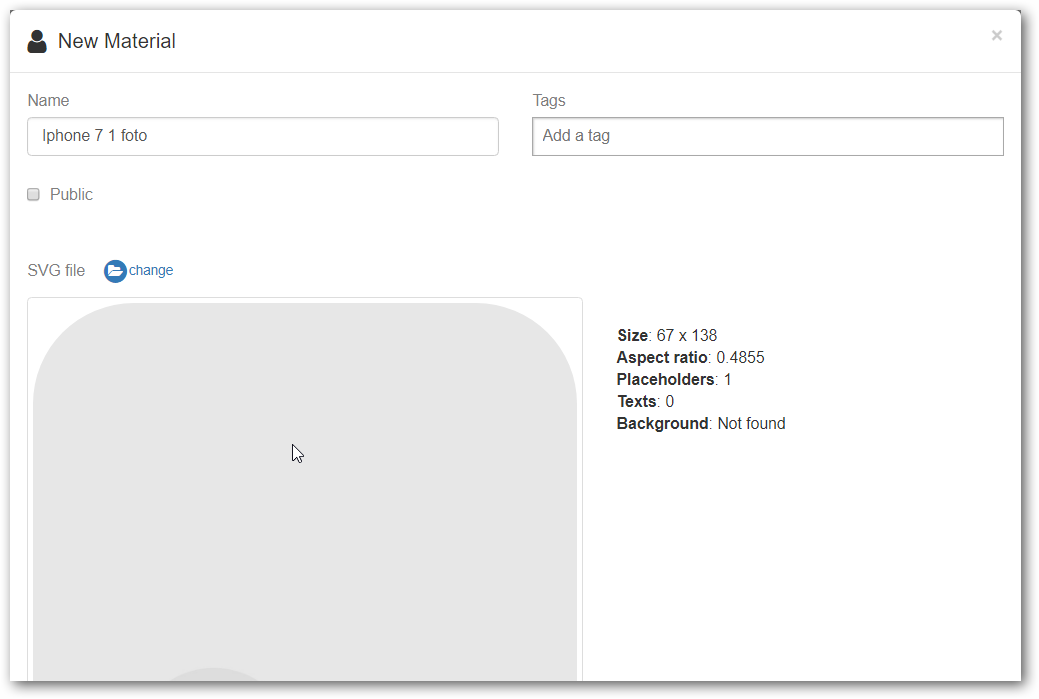
The Materials are necessary when the design for a product has more than one image, they have a non-rectangular shape or we want a text to appear in a certain area.
When dealing with Web editors, some of the designs or scenes may have to be prepared in SVG vector files.
To work with svg files you can download a free distribution design program, called Inskape, to work with SVG templates in vector format, although you can also work with Adobe Illustrator, you can visit the Web at the following link: https://inkscape.org
This material is classified into two tabs: Scenes and Designs.
For that we will use the following resources that correspond to the tabs:
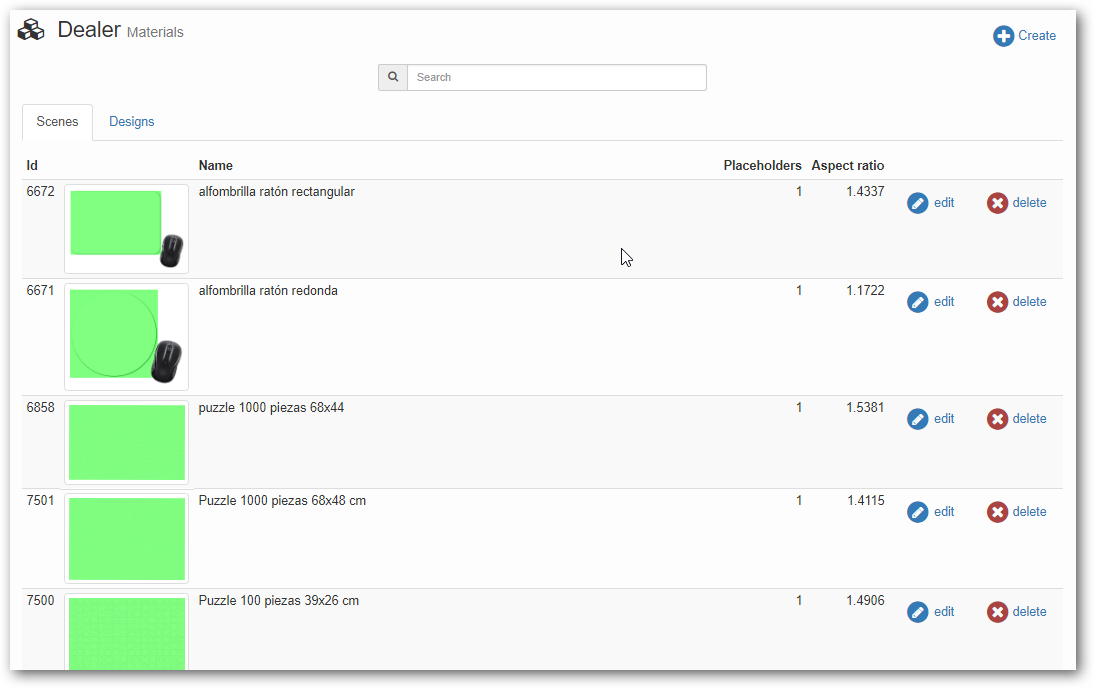
- Scenes. They are the graphic elements that can combine images or sets to represent on the screen and put the user in a situation.
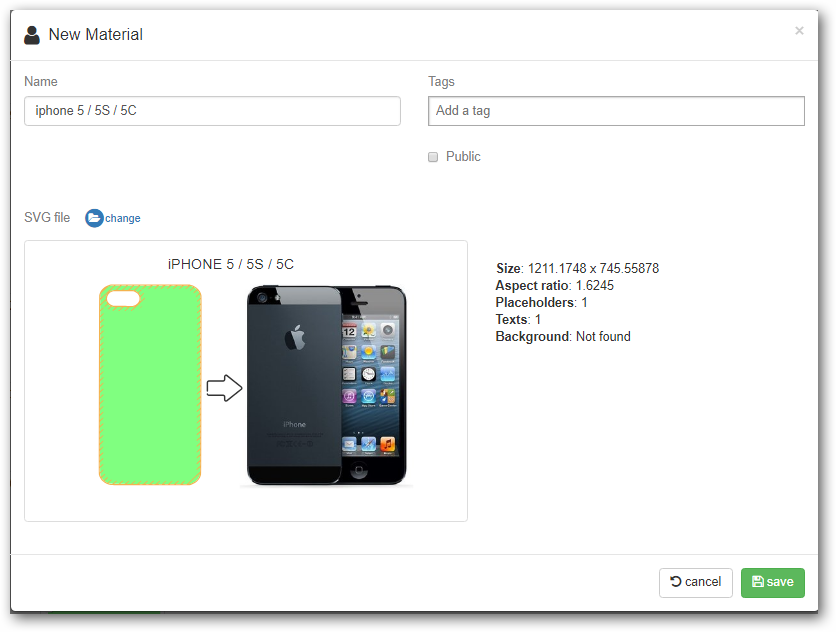
- Designs. These are the graphic elements that help us create the design of the printable area. Following the case of the phone scene we should create an svg image file with the actual dimensions of our casing superimposing an area with the rounded shapes that we will then cut out.
Creation of products
At the moment of creating a new product we have to select the type of editor we are going to use.
We will have to configure a series of characteristics that are common in all the products.
All products must have a product code, a name, price, the size of the product, as well as the measurements and format of each file to be printed (JPG or PDF).
It is also convenient to use a representative image of the product to be able to show it in multikiosk or on the product testing website.
General concepts
When registering a product, it must have a product code, a name and at least one variant.
The system allows adding more variants to the product that may have different characteristics from each other.
Application parameters
Which title
In this section we can configure how the title of the product will be displayed in the editor bar. We can select the name of the product or the name of the variant.

Collapse menus with more options than
It is also possible to configure the number from which the options menu in the editor “collapse” and starts to function as a pop-up window so that all the formats programmed in the product do not appear.
By default it is 5, therefore, if the product has more than 5 variants, only one will be shown in the editor as a pop-up selection window.

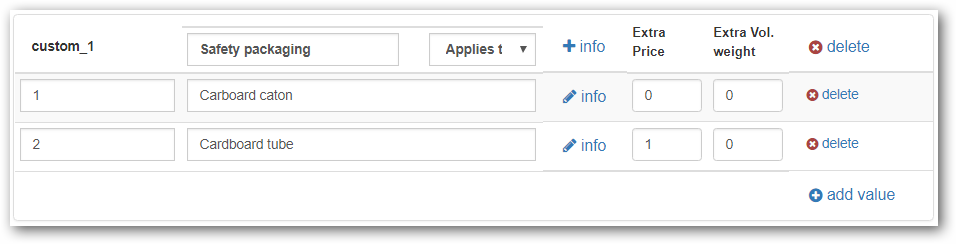
Product Variants
A product can be configured to offer more than one variant of that product. In each variant you have to configure all the characteristics of the product, production codes, name, sizes, etc.
The SKU field allows you to customize each variant with an alphanumeric code. It can be used as a billing code.
We can customize the text of the Variants field with a name that is more descriptive for the client, this name will be displayed on screen to offer the different variants.
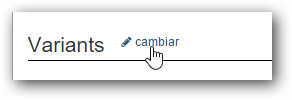
For example, we can create a product of type Prints that we will call “Photo printing”, and add different variants that we will call “Photo Printing Sizes”, which could be the different sizes of copies that we want to offer, each variant will have different size and different price.
Through the option “Reorder” we can organize in which position we want to show the variants in the editor. Select and drag to the position desired.
Default variant “favorite”
In the variants tab you can mark 1 of them as “by default” (or “favorite”).
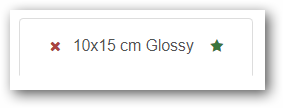
To do this, click on the “star” symbol that appears to the right of the name of the variant
When editing the product, the variant marked as the first option will be shown to the client.
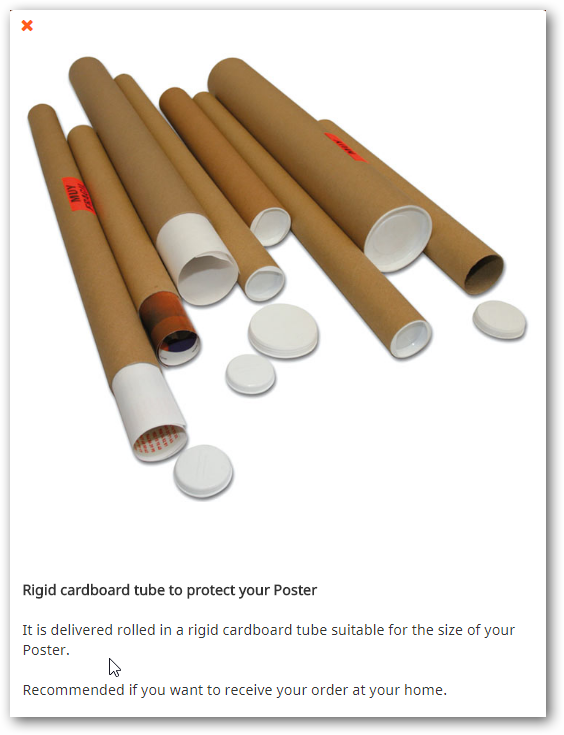
Option +info
Through the option “+ info”, which appears in different sections, we can add additional information to give the customer the maximum product information.
When clicking on + info we will see a screen that allows us to personalize with an image and descriptive texts of the product.
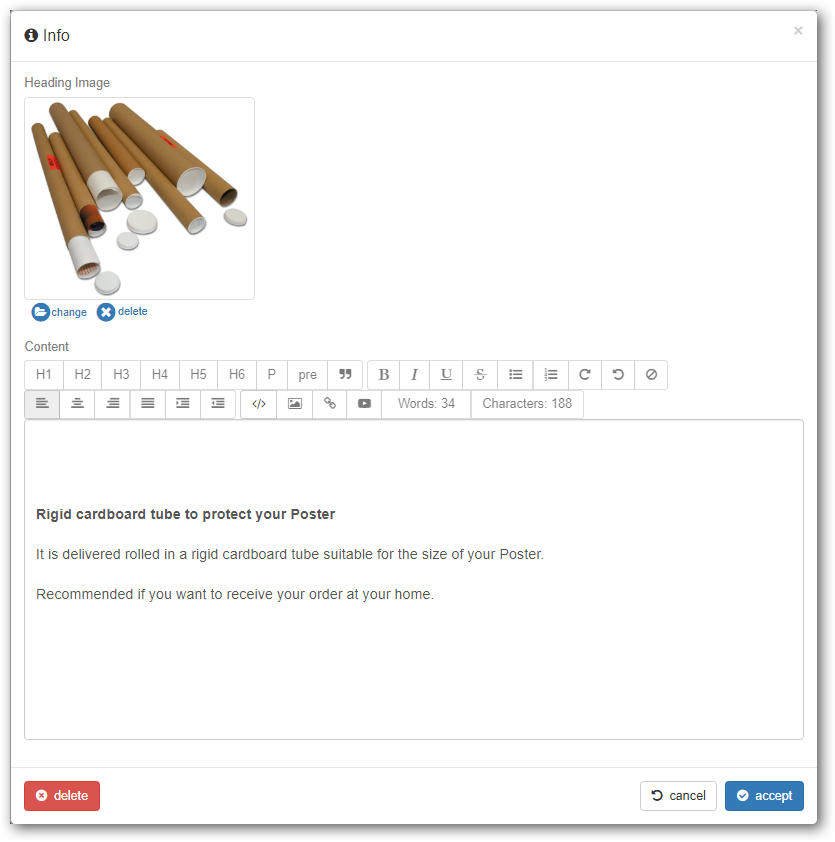
In the product that we have selected to add the additional information, the editor will show an icon with an “i” of information that the client can select to see the details

Price Model
We can use two price models, price per packs or price per unit, which can be configured differently depending on the product editor.
Editors of Copies Pack of copies and Polaroid allow to use the two price models.
Page dimensions
In this section we must configure the size, in millimeters, of each variant of the product.
This menu can offer more configuration options depending on the type of product editor that we have selected, and will be explained in more detail in the specific documentation of each editor.
Output file
In this menu we must configure the paper size dimensions of the files to be printed, if we want to use impositions, as well as the format of each file that can be JPG or PDF files.
Each image of the orders are downloaded to print with the measurements, the file format and the configured dpi.
For products with classic sizes (10×15 cm (4×6 inch), 15×20 cm (6×8 inch) etc.), to print on minilab or sublimation printers, we will generally use the output file without imposition, with the same product dimensions and print resolution.
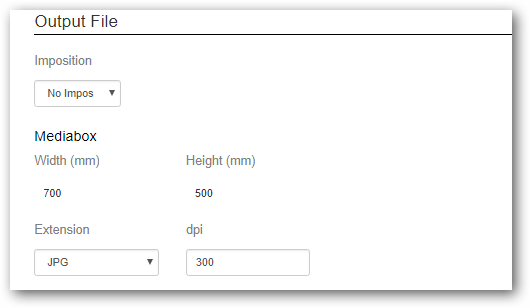
We can use select two types of impositions, imposition One Up and Multi UP.

Bleed (mm) and Bleed Fill
In graphics systems, is known as “Bleed” (bleeding), to the extent that you should extend the printing of a document that is printed to the same edge so that when cutting at the end of the guillotine there are no white edges or empty.
When selecting an imposition we can configure the millimeters that we need for the bleed and the type of filler that will be used for it.
We can use two types of fill to represent the configured bleed:
- The “Scale” option will scale the image by increasing the size of the millimeters that we have configured in the bleed.
- The option “Background color” will add a margin of the color of the background with the millimeters that we have configured.
One Up Imposition
The One Up Imposition can be used if we want to print a single image of an order in a larger paper format.
This imposition is generally used for Posters, Collages etc. where the image of the product is printed on a larger page and it is necessary to have cutting marks.


Ex. One Up Imposition
Multi Up Imposition
We can use Multi Up imposition if we want to take advantage of a larger paper format to print more than one image of the same order on the same page. If the total number of images does not fit on a single page, the system will generate as many pages as you need to print the total images of the order.
For example, we could set up a product of Pack of 12 photos where the size of the images to print is 10×10 cm and we want to print the 12 images on a sheet of paper size SRA3, doing a imposition Multi Up with 2 mm. of bleed and using the scaled bleed padding.
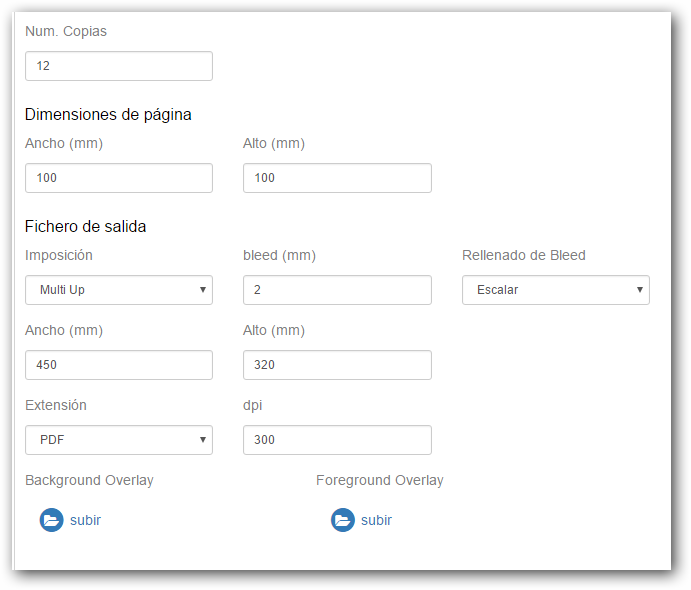

Ex. Multi Up Imposiiton
Options
All editors allow you to add a series of options that vary depending on the type of editor.
Some of these options affect the file to be printed (margins, background color, orientation, text font), others are visual characteristics (edge colors, canvas effects, etc.) that help the client understand the product they are personalizing, and the personalized options that allow adding additional features to the product.
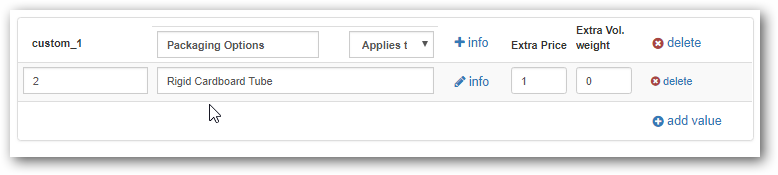
Customised Option
This option allows the customization of any extra feature that we want to offer the product, and allows us to add as many personalized options as needed and it is possible to add an additional cost for each option.
It is available for all types of editors and does not affect the images to be printed.