How to define the attributes of a combined product
What are attributes?
Attributes are the characteristics that define your product, for example, its size, color, etc. The objective of defining attributes in your combined product is to offer the customer the possibility of personalizing their order, being able to choose between so many variations of the same product that you wish to offer.
You can assign attributes and values to your product, so that the customer can choose between them when making their purchase. If you want your customer to choose between two different paper qualities (for example, Basic and Premium), you will need to set an attribute called “Quality” and two values called “Basic” and “Premium.” You can configure as many attributes and values as you want and create different rules (in the “Rules” section) for them.
Create attributes
To create an attribute we will go to the Options section of our product, then we can see the Attributes section where we can define the name of the attribute that we are going to create (Attribute name) and the values of said attribute (Attribute values). With both fields filled in, press the Save Attribute button highlighted to create the attribute:
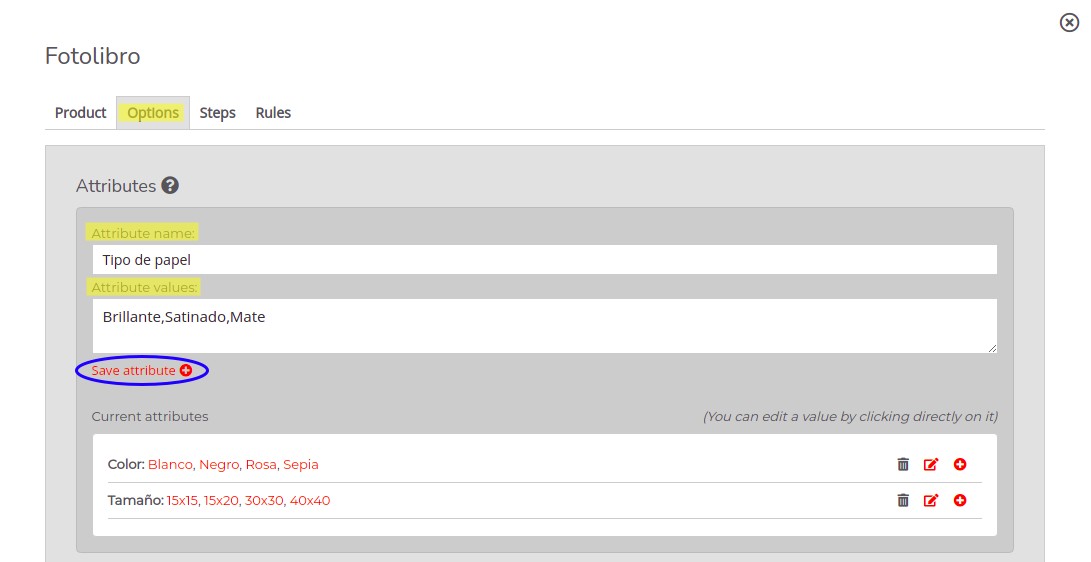
By pressing the button, you can see that the list of Current Attributes has been updated, this list shows all the attributes configured in the product, as well as a list with the values of each of the attributes.
Edit attributes
With the attribute already created, you can take various actions to manage it, including: deleting the attribute, changing its name, adding an internal code to the attribute, adding values to already created attributes, or modifying existing values.
You can remove an attribute by clicking on the icon highlighted in the image below:

IMPORTANT! You must bear in mind that this process is irreversible, you will not be able to recover an attribute once you delete it.
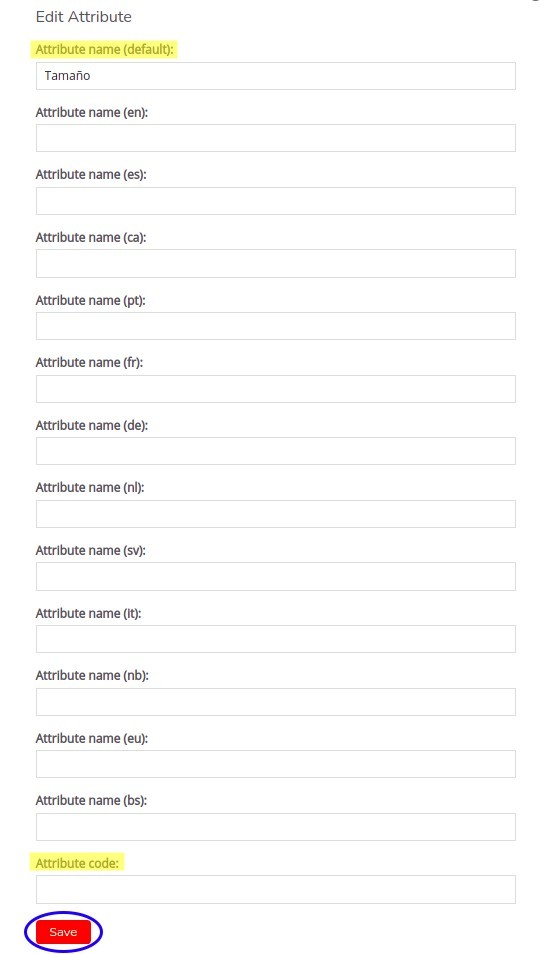
You can edit the name of an attribute by clicking the icon highlighted in the following image:

Clicking on the icon will open a new window where you can modify the value stored in Attribute Name. You can display a different name for each language that the store has configured, using (default) will determine the name that will be displayed in the default language of your store.
The Attribute code section is used to link an internal code to the attribute, in this way the laboratory or shop receives both the value that it shows to the end user and the internal code that it has designated.
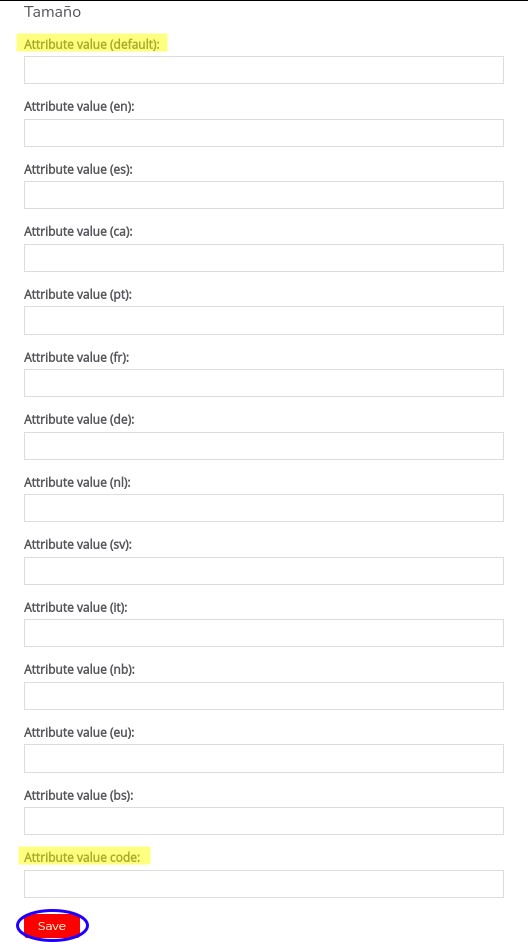
You can add more values to an attribute by clicking the icon highlighted in the image below:

Again a window will open when clicking on the icon, in it you can add the name of the attribute value with the Attribute value and add an internal code to the attribute value with the Attribute value code, this offers infinite possibilities of customization, for example, defining the value of the Emerald Green attribute for the end user, but that along with that value also comes an internal code designated by you, such as the code of the color with which you work (for example, #287233 corresponds to hexadecimal emerald green code).
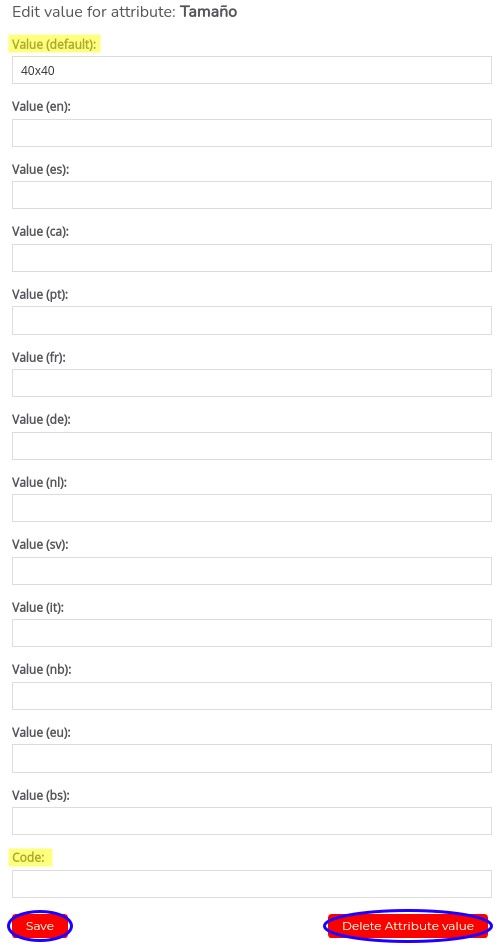
You can also edit the value of an attribute by clicking on it directly, as indicated in the message in the Current attributes section:

A window similar to the previous one is displayed, in it we can modify the value and add or modify its internal code. Finally, we can also delete the value by pressing Delete Attribute Value: