Calendar Component
Forget creating tables and create multiple calendars to sell and customize in minutes!
At Imaxel we are constantly evolving and we always take into account the requests of our clients. That is why we have developed a new component for the creation of automatic calendars for online sale and personalization.
What can we configure in our calendar product for its sale?
- All the features already available for all our products (printing area, bleed, pages, etc …)
- Calendar type 12 months on one sheet or 12 months on 12 sheets.
- Layout of the calendar space and customizable space with photographs and texts.
- Font sizes, margins and colors.
What can our clients do with the automatic calendars?
- Select +30 languages
- Set date
- Add holidays automatically
- Add photos and text
- Choose between different funds
- Choose between different photographic distributions
Instructions
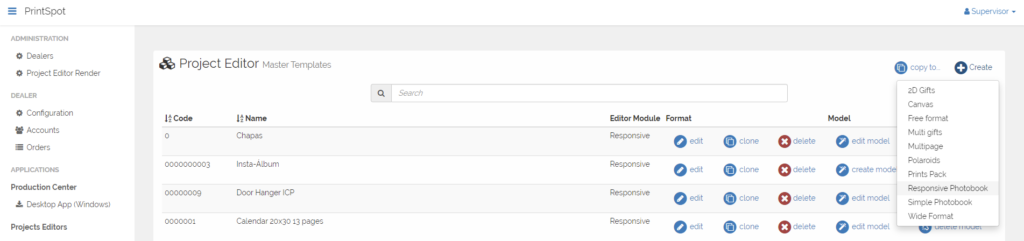
To use the Automatic Calendars component we are going to create a new template with the Responsive Photobook editor.
At the top right of the screen, create button, select Responsive Photobook.
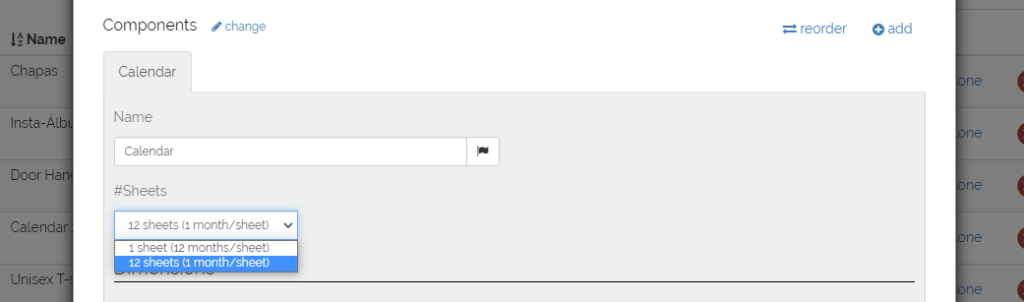
Next, to add the calendar component we have to go to the Components section and click on the Add -> Calendar button

We can use the calendar component independently of the Cover or Pages.
We can choose between two options for the type of calendars.
A summary one that will have a calendar of 12 consecutive months on a single page.
The other option is 12 pages with one consecutive month per page.
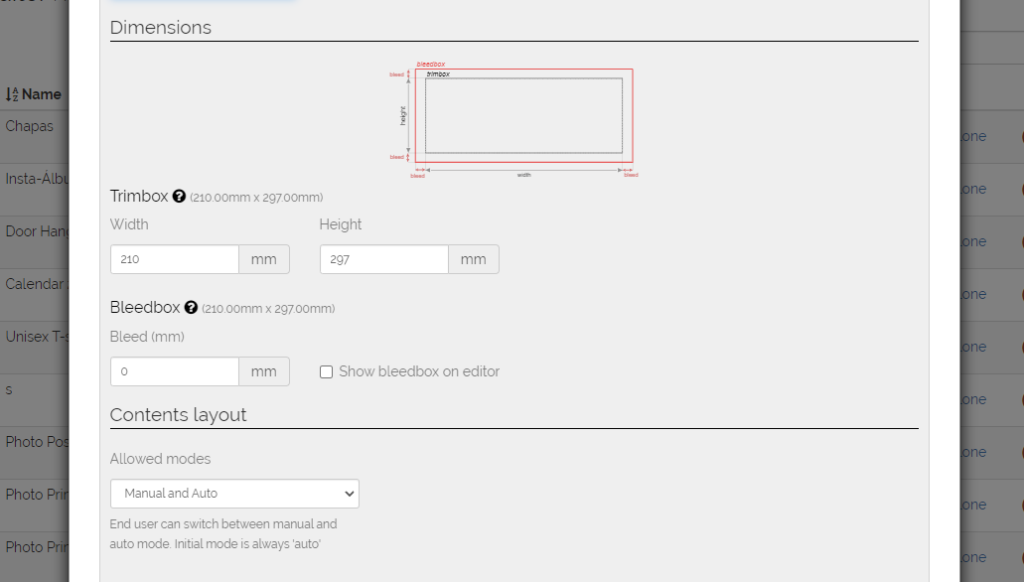
In the two options we are going to have to configure our trimbox and our bleed.
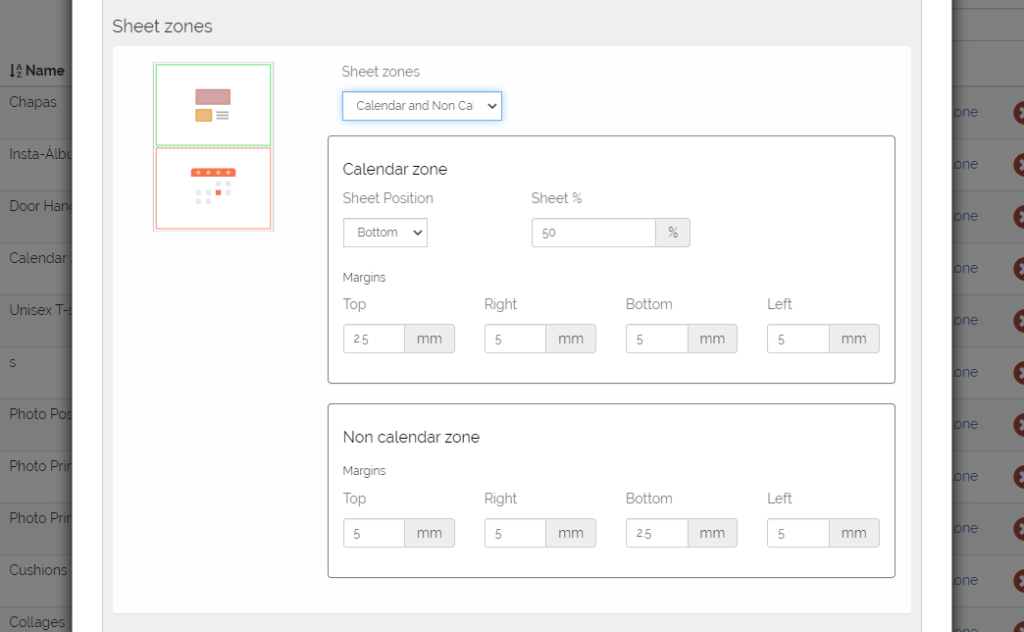
Continuing with the configuration, we will be able to choose between an arrangement of 2 zones (Calendar + Photo) or 1 zone (only calendar).
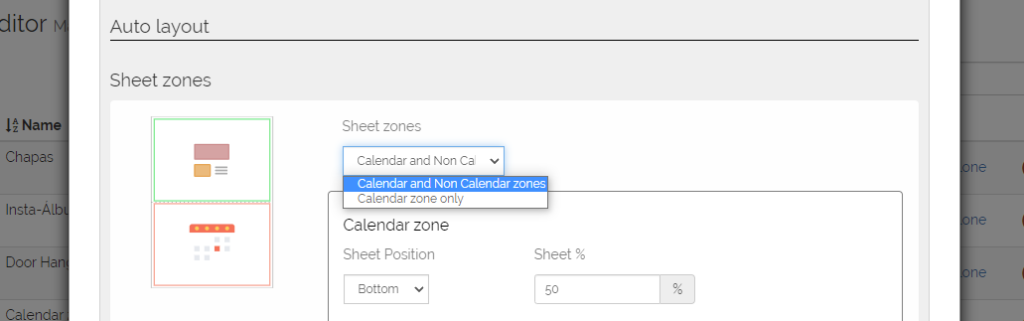
With the option of 2 zones (calendar + photo) we will be able to choose where we want each zone to be (up, down, left or right) and its size.
In turn, we can independently adjust the safety margins of the two zones.
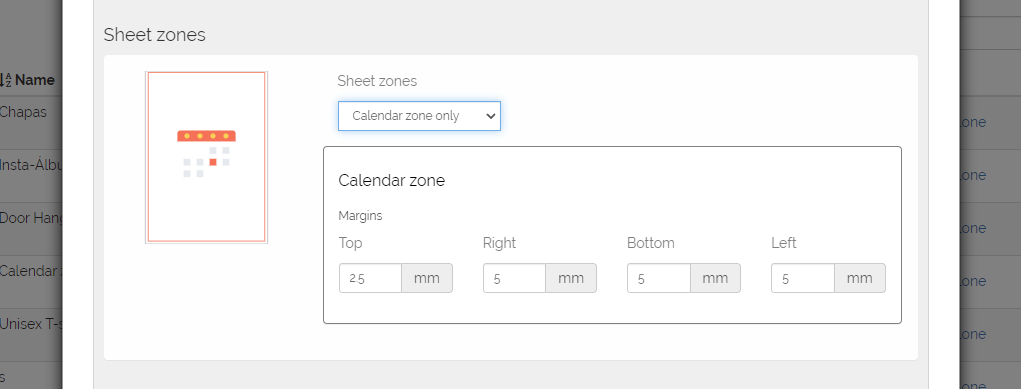
If, on the other hand, we want to make a calendar of a single area that occupies the entire page, we can only adjust the margins of that area.
Continuing with the configuration, we are going to customize our calendar.
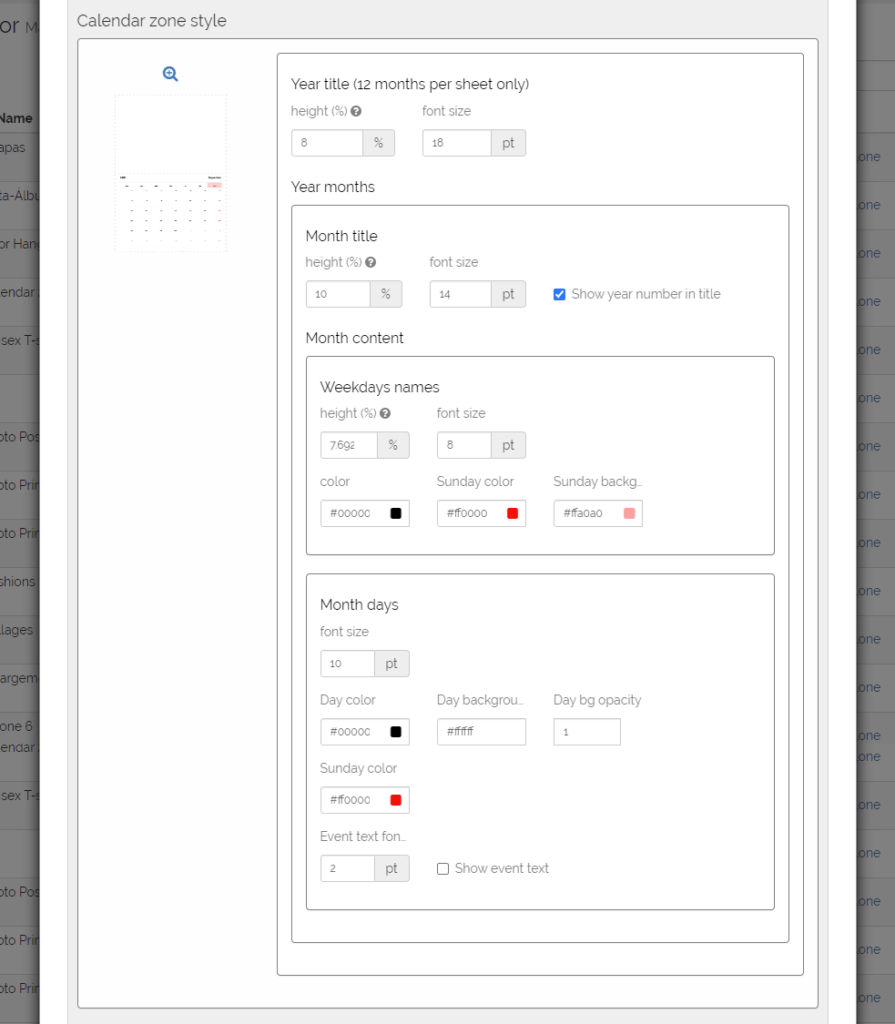
We have the option (only in 12-month calendars on a sheet) to adjust the space for the title and its size. This title will be the year and first month selected + year and last month selected.
We can also define the space and font size for the title of the month, as well as choose whether or not we want to show the year in the title of the month.
On the other hand, we will also be able to configure the space and font size of the names of the days of the week. In this case, we can also define a color for normal days, and a different one for holidays and their respective background.
Finally, we can also configure the days of the week in font size, color and background for normal day and color and background for holidays.
The last option we have is to choose whether to add the texts of the holidays and the size of the font.
This new component can be combined with other components such as the Cover or Pages to form different types of calendars.
In summary, this component coexists with all the options offered by the Responsive Photobook editor, such as choosing the output format, adding backgrounds, etc …